

| | Turning TeX into bitmaps | Contents | Index |
TeX into bitmaps
Sometimes the only sensible way to represent some LaTeX concept in an
HTML-document is by turning it into a bitmap. Hyperlatex has an
environment image that does exactly this: In the
HTML-version, it is turned into a reference to an inline
bitmap (just like \htmlimg). In the LaTeX-version, the image
environment is equivalent to a tex environment. Note that running
the Hyperlatex converter doesn't create the bitmaps yet, you have to
do that in an extra step as described below.
The image environment has three optional and one required arguments:
  \begin{image}[attr][resolution][font_resolution]{name}
    TeX material ...
  \end{image}
For the LaTeX-document, this is equivalent to
  \begin{tex}
    TeX material ...
  \end{tex}
For the HTML-version, it is equivalent to
\htmlimg{name.png}{}
The optional attr parameter can be used to add HTML attributes
to the img tag being created. The other two parameters,
resolution and font_resolution, are used when creating
the png-file. They default to 100 and 300 dots per
inch.
Here is an example:
   \W\begin{quote}
   \begin{image}{eqn1}
     \[
     \sum_{i=1}^{n} x_{i} = \int_{0}^{1} f
     \]
   \end{image}
   \W\end{quote}
produces the following output:

We could as well include a picture environment. The code
  \begin{center}
    \begin{image}[][80]{boxes}
      \setlength{\unitlength}{0.1mm}
      \begin{picture}(700,500)
        \put(40,-30){\line(3,2){520}}
        \put(-50,0){\line(1,0){650}}
        \put(150,5){\makebox(0,0)[b]{$\alpha$}}
        \put(200,80){\circle*{10}}
        \put(210,80){\makebox(0,0)[lt]{$v_{1}(r)$}}
        \put(410,220){\circle*{10}}
        \put(420,220){\makebox(0,0)[lt]{$v_{2}(r)$}}
        \put(300,155){\makebox(0,0)[rb]{$a$}}
        \put(200,80){\line(-2,3){100}}
        \put(100,230){\circle*{10}}
        \put(100,230){\line(3,2){210}}
        \put(90,230){\makebox(0,0)[r]{$v_{4}(r)$}}
        \put(410,220){\line(-2,3){100}}
        \put(310,370){\circle*{10}}
        \put(355,290){\makebox(0,0)[rt]{$b$}}
        \put(310,390){\makebox(0,0)[b]{$v_{3}(r)$}}
        \put(430,360){\makebox(0,0)[l]{$\frac{b}{a} = \sigma$}}
        \put(530,75){\makebox(0,0)[l]{$r \in {\cal R}(\alpha, \sigma)$}}
      \end{picture}
    \end{image}
  \end{center}
creates the following image.
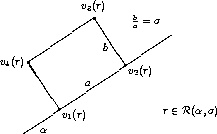
image environment. Furthermore, this
LaTeX-run produces another file with extension .makeimage,
which contains commands to run dvips and ps2image to extract
the interesting pages into Postscript files which are then converted
to image format. Obviously you need to have dvips and ps2image
installed if you want to use this feature. (A shellscript ps2image
is supplied with Hyperlatex. This shellscript uses ghostscript to
convert the Postscript files to ppm format, and then runs
pnmtopng to convert these into png-files.)
Assuming that everything has been installed properly, using this is
actually quite easy: To generate the png bitmaps defined in your
Hyperlatex source file source.tex, you simply use
hyperlatex -image source.tex
Note that since this runs latex on source.tex, the DVI-file source.dvi will no longer be what you want!
For compatibility with older versions of Hyperlatex, the gif
environment is equivalent to the image environment. To produce
gif images instead of png images, the command \imagetype{gif}
can be put in the preamble of the document.
| | Turning TeX into bitmaps | Contents | Index |